


Lab grown diamond jewellery can lose its shine as dirt and oil build up. Skin oils, dust and skincare products can leave diamonds looking dull. An ultrasonic cleaner helps remove this buildup in just a few minutes. With proper care, you can use one at home to clean suitable jewellery.
Even a thin layer of dirt can affect how light reflects from a diamond. Regular cleaning helps restore the bright look of your jewellery. Ultrasonic vibrations can also reach small spaces around settings and decorative details. These machines use tiny bubbles to loosen dirt without hard scrubbing.
Before using the machine, check whether your jewellery is safe to clean this way. Understanding how the cleaner works helps you choose the right method. This guide covers preparation, cleaning, drying and machine care. It also explains common mistakes that could damage delicate jewellery.
How Does an Ultrasonic Machine Clean Jewellery?
An ultrasonic cleaner sends high-frequency sound waves through liquid inside its tank. These waves create tiny bubbles that form and collapse very quickly. This action helps loosen dirt from jewellery surfaces. The process, called cavitation, can reach places that are difficult to clean by hand.
What Happens Inside the Tank
- Water and a suitable cleaning solution fill the tank.
- A part called a transducer changes electrical energy into vibrations.
- These vibrations create tiny bubbles throughout the liquid.
- When the bubbles collapse, they help lift dirt from the jewellery.
- The cleaning action reaches small spaces around prongs, settings and chain links.
- Less rubbing is needed to remove everyday dirt.
Why It Helps More Than a Brush
A soft brush can remove dirt from the outer surfaces of jewellery. However, its bristles may not reach beneath settings or inside detailed designs. Ultrasonic vibrations help loosen dirt from these hidden areas. This makes the method useful for suitable rings, earrings and bracelets.
Is Lab Grown Diamond Jewellery Safe in an Ultrasonic Tank?
Ultrasonic cleaning is not suitable for every piece of lab grown diamond jewellery. Lab grown diamonds have the same chemical composition and crystal structure as mined diamonds. However, their settings and other materials may not withstand ultrasonic vibrations. Check the jewellery's condition and identify all its gemstones before cleaning.
What to Check Before You Start
- Gently move the jewellery and check whether any part makes a rattling sound.
- Look for bent, thin or damaged prongs.
- Check whether any parts use glue, thread or cord.
- Remove detachable parts only when the care instructions allow it.
- Read the care information supplied with the jewellery.
- Ask a jeweller about plated finishes or special coatings.
Pieces to Keep Out of the Tank
Ultrasonic vibrations can damage certain gemstones and delicate jewellery designs. Pearls and opals may suffer surface damage during cleaning. Some emeralds are also at risk because of their inclusions or treatments. Take antique, fragile or damaged pieces to a jeweller first. Fracture-filled or treated diamonds should not be ultrasonically cleaned. Ensure a jeweller confirms the treatment is compatible.
Which Types of Jewellery Suit Ultrasonic Cleaning?
The right cleaning method depends on the materials and condition of each piece. Secure gold, platinum and silver jewellery may be suitable for ultrasonic cleaning. Beaded designs, delicate parts and certain gemstones need extra care. Use the table below as a general guide before cleaning your jewellery.
| Jewellery piece | Ultrasonic cleaning | What to check |
| Solitaire or band ring | Often suitable | Check that the band and setting are secure |
| Stud earrings | Often suitable | Check the settings and removable backs |
| Tennis bracelet | Suitable with care | Check the clasp, links and settings |
| Pendant and chain | Often suitable | Check the chain links and pendant attachment |
| Mangalsutra with beads | Generally avoid | Thread and beads may loosen |
| Pearl or opal jewellery | Not recommended | Delicate surfaces may suffer damage |
| Plated or coated jewellery | Ask a jeweller | Cleaning may affect the finish |
Tips for Rings, Earrings and Necklaces
- Rings: Place each ring separately inside the basket to prevent contact.
- Earrings: Keep matching earrings together and check their fittings.
- Necklaces: Arrange chains loosely to reduce tangling.
- Bracelets: Check the clasp and links before starting the cleaning cycle.
Machine or Hand Cleaning: Which Is Better?
The best cleaning method depends on the jewellery and the dirt it collects. Hand cleaning works well for light dirt on suitable pieces. Ultrasonic machines can loosen buildup in small spaces when the jewellery is suitable. Professional cleaning is better when a piece needs repair or a closer inspection.
| Method | Best for | Keep in mind |
| Soft brush and mild soap | Light surface dirt | Brush gently around the settings |
| Home ultrasonic cleaner | Dirt in small spaces | Avoid unsuitable gemstones and loose settings |
| Professional jeweller cleaning | Deep cleaning and safety checks | An appointment may be needed |
Signs Your Jewellery Needs a Clean
Changes in appearance can help you decide when your jewellery needs cleaning. Check for these signs instead of following a strict cleaning schedule.
- Diamonds look dull under normal lighting.
- Greasy dirt collects on the metal or diamond surfaces.
- Dirt gathers around prongs or beneath settings.
- Jewellery worn often develops visible buildup.
- Diamonds no longer reflect light as clearly as before.
How to Clean Your Diamond Jewellery Step by Step
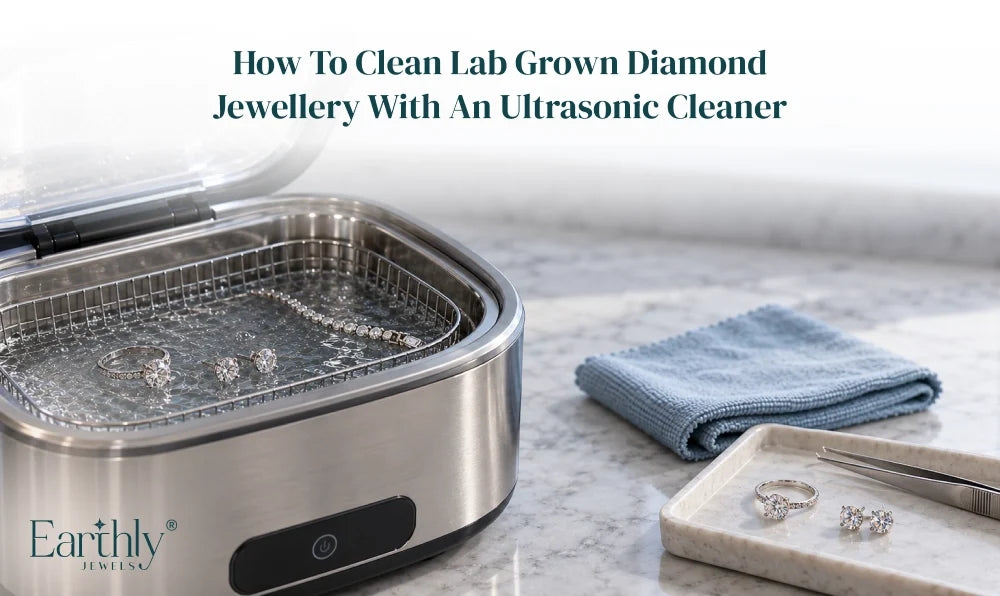
Prepare your tools before placing any jewellery near the machine. You will need a suitable cleaner, its basket, an approved solution, a soft brush and a lint-free cloth. The process may take about ten minutes, depending on the machine and jewellery. Check that every piece is suitable for ultrasonic cleaning before you begin.
Step 1: Fill the Tank
- Place the cleaner on a stable, dry surface.
- Add clean water up to the level marked in the manual.
- Add a suitable jewellery cleaning solution as directed.
- Never run the machine without the required liquid.
- Let the liquid settle before adding the basket.
A Quick Water Tip
Use water at the temperature recommended in the machine's manual. Avoid boiling water because high heat may damage some materials. If your cleaner has a heater, follow its temperature instructions.
Step 2: Load the Jewellery
- Place each piece inside the basket, away from the tank floor.
- Keep pieces apart to prevent them from knocking together.
- Position each item so the liquid reaches the areas needing cleaning.
- Avoid filling the basket too tightly, as this limits liquid movement.
- Close the lid if your machine has one.
Step 3: Run a Short Cycle
- Choose a cleaning time allowed by the machine's instructions.
- Some suitable pieces may need only three to five minutes.
- Check the jewellery before deciding whether another cycle is needed.
- Keep your hands away from the liquid while the machine runs.
- Switch off the machine before removing the basket.
Longer cleaning does not always give better results. Follow the recommended time for your machine and jewellery.
How Often to Clean
Jewellery worn often may need monthly cleaning if ultrasonic treatment is suitable. Visible dirt may need earlier attention, although hand cleaning could be safer. Jewellery worn less often usually collects less dirt. Wipe suitable pieces with a soft cloth after wearing to reduce buildup.
Step 4: Rinse and Dry
- Close the sink drain before handling small jewellery pieces.
- Rinse each piece if its care instructions allow it.
- Remove leftover dirt with a soft brush when suitable.
- Gently dry the jewellery with a clean, lint-free cloth.
- Check the settings for movement or visible damage.
- Let every piece dry fully before storing it.
Common Mistakes to Avoid
Small mistakes during cleaning can damage delicate jewellery. Checking your equipment and jewellery first helps prevent avoidable problems.
- Running the cleaner without the required liquid.
- Placing jewellery directly on the tank floor.
- Using chemicals not approved for the machine or jewellery.
- Running the machine longer than recommended.
- Leaving cleaning solution on jewellery when rinsing is required.
- Cleaning pieces with loose stones or weak prongs.
- Putting delicate gemstones inside the tank.
- Assuming every diamond setting is safe because diamonds are hard.
How to Choose a Good Ultrasonic Machine
Choose a machine that suits the jewellery you plan to clean. Clear instructions and a suitable basket make cleaning easier. Adjustable timing and simple maintenance can also help. Read the safety instructions before buying or using a machine.
Features to Compare
- Tank size: Choose a tank that fits your rings, earrings and bracelets.
- Frequency: Many home cleaners work near 40 kHz, but suitability can vary.
- Timer: Adjustable settings help control the cleaning time.
- Basket: A suitable basket keeps jewellery off the tank floor.
- Drain: A drain makes it easier to empty the tank.
- Solution compatibility: Check which cleaning liquids the maker allows.
- Support: Check the manual, warranty and customer service options.
Care Tips for Your Machine and Your Pieces
Your cleaning machine also needs care after every use. Removing used liquid helps stop dirt from collecting inside the tank. Jewellery also benefits from careful handling and safe storage. These simple habits make regular care easier.
Machine Care
- Empty the tank and dry it after every use.
- Clean the inside according to the manufacturer's instructions.
- Avoid liquids not approved for your machine.
- Store the machine in a dry place.
Jewellery Care Between Cleans
- Apply perfume and skincare products before putting on jewellery.
- Remove jewellery before activities involving chemicals or hard impacts.
- Store each piece separately to help prevent scratches.
- Ask a jeweller to check prongs, settings and clasps regularly.
4 Practical Tips
- Lighting: Check the jewellery under bright light to spot hidden dirt.
- Brushing: Use a soft brush only when the care instructions allow it.
- First use: Test the machine with one sturdy, suitable piece.
- Drying: Wipe the basket well to remove any remaining moisture.
Key Takeaways
- Safety: Check the settings, finish and other materials before cleaning.
- Diamonds: Lab grown diamonds share the chemical structure of mined diamonds.
- Metal: Secure gold, platinum and silver jewellery may be suitable for ultrasonic cleaning.
- Avoid: Pearls, opals and certain emeralds need other cleaning methods.
- Solution: Use a cleaning product approved for the machine and jewellery.
- Timing: Follow the recommended cleaning time for your equipment.
- Basket: Keep jewellery inside the basket during cleaning.
- Rinsing: Wash away leftover solution when the care instructions recommend it.
- Maintenance: Clean and dry the tank after every use.
- Inspection: Ask a jeweller to check loose stones, worn prongs and damaged clasps.
Conclusion
Lab grown diamond jewellery needs proper care to maintain its shine. An ultrasonic cleaner can loosen dirt, but some designs need gentler cleaning methods. Check each piece before cleaning and follow the correct rinsing instructions. Regular care and professional checks help keep your jewellery looking its best.
Regular care also helps preserve the appearance of your jewellery over time. Store each piece separately. Keep it away from harsh chemicals and check its settings periodically. Use the right cleaning method and handle with care. This maintains the beauty of your lab grown diamond jewellery and reduces avoidable damage.
Frequently Asked Questions
Can I use an ultrasonic cleaner on lab created diamonds?
Lab created diamonds are resistant to scratches because of their hardness. However, the complete jewellery piece may not be suitable for ultrasonic cleaning. Settings, metal finishes and other gemstones can affect its safety.
How long should I run one cycle?
The right cleaning time depends on the machine and jewellery. Some suitable pieces may need only three to five minutes. Always follow the manufacturer's instructions.
Can I use dish soap in the tank?
Dish soap is suitable only if the machine's instructions allow it. A jewellery cleaning solution may work better for certain materials. Never use chemicals that the manufacturer has not approved.
Can I clean a mangalsutra in an ultrasonic machine?
Check the mangalsutra's design before choosing a cleaning method. A securely set diamond pendant may be suitable, but threaded beads can loosen. Ask a jeweller if you are unsure about its materials.
Which types of jewellery should I never put in the tank?
Pearls, opals, glued parts and thread-strung designs are generally unsuitable. Certain emeralds and treated gemstones may also be at risk. Ask a jeweller before cleaning fragile or damaged pieces.
How often should I clean my diamond jewellery?
Cleaning frequency depends on how often you wear each piece. Frequently worn jewellery may need monthly cleaning, while other pieces may need less. Wiping jewellery after wearing helps reduce dirt between deeper cleans.



Share:
Lab Created Diamonds and the Truth Behind Common Myths
What Is a Lab Grown Diamond? The Complete Beginner’s Guide